When you need to notify someone other than the contact involved in a workflow, use the "Send Internal Notification" action. To start, click the plus icon in the workflow action menu and choose "Send Internal Notification." This action lets you send alerts to team members whenever specific events occur, such as the submission of a new lead form.
Notification Types
Sender Name: Enter the name of the person sending the email. You can also click the tag icon to insert a custom value.
Sender Email: Provide the sender's email address. Custom values can be used to fill this field as well.
Recipient Type: Choose who should receive access to the contact. Options include:
All Users: Notify all team members.
Assigned User: Automatically link the contact to the user it is assigned to.
Custom Email: Send an email to the contact using a custom email (e.g., your domain name).
Particular User: Assign the contact to a specific user, especially if it hasn't been assigned yet.
Subject: Enter the subject of the email.
Template: Select from available templates by clicking here.
Message Body: To customize your message, select "None" under the Template section, which will activate the message editor. Type your message here, and feel free to use "Custom values" and "trigger links" as needed.
Add Attachments: Click the icon to attach files to the email.
Test Emails: Test your composed email by entering a demo email address and clicking "Send Test Mail." You can use your email for testing.
Notification Details
Title: Enter the title of the notification. You can use custom values by clicking the tag icon on the
right.
Message Body: Type the content of the notification here. The field also includes a custom value icon on the upper left side.
Redirect Page: Select the page you want the notification message to redirect to.
SMS
Recipient Type: Select who should have access to the contact.
Templates: Choose a template from the available options.
Message Body: Type your message content here.
Add Attachment: Attach files to your message by clicking the icon.
Add Files Through URL: Input the URL in the field and click "+Add" to attach a file via URL.
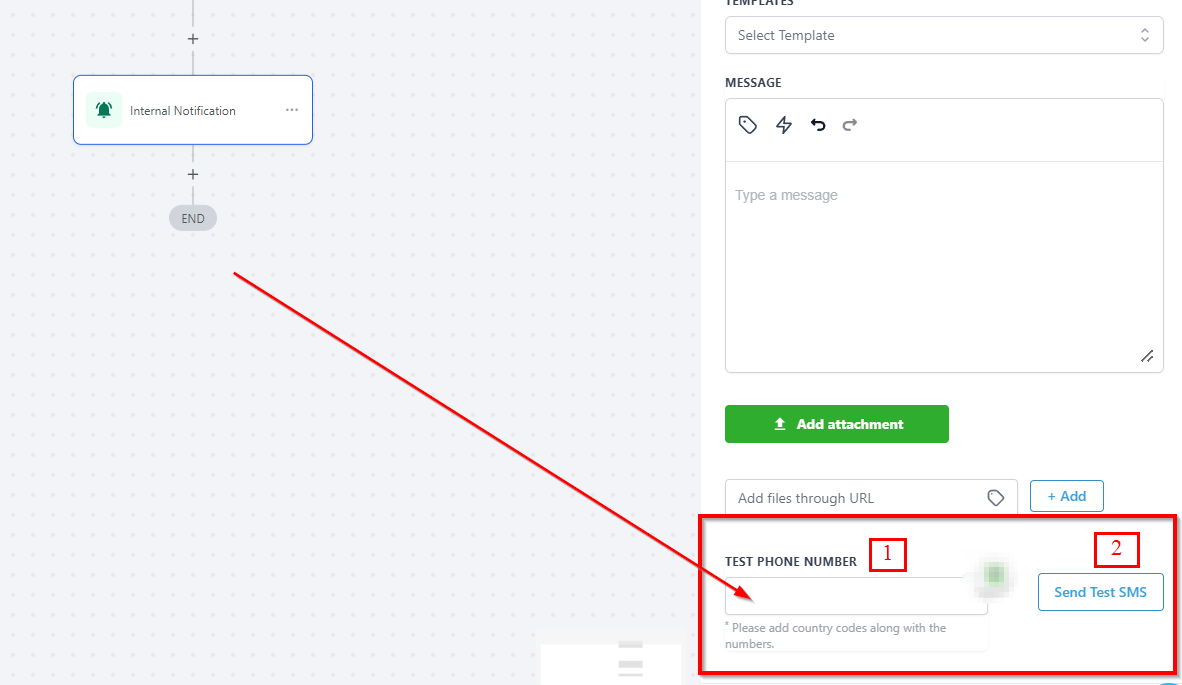
Test Phone Number: Enter a demo phone number and click "Send Test SMS" to test your composed message. Use your cellphone number for testing until you are satisfied with the result.

Was this article helpful?
That’s Great!
Thank you for your feedback
Sorry! We couldn't be helpful
Thank you for your feedback
Feedback sent
We appreciate your effort and will try to fix the article


